Spooky Mouth Cookies: An Easy Gluten Free Halloween Treat

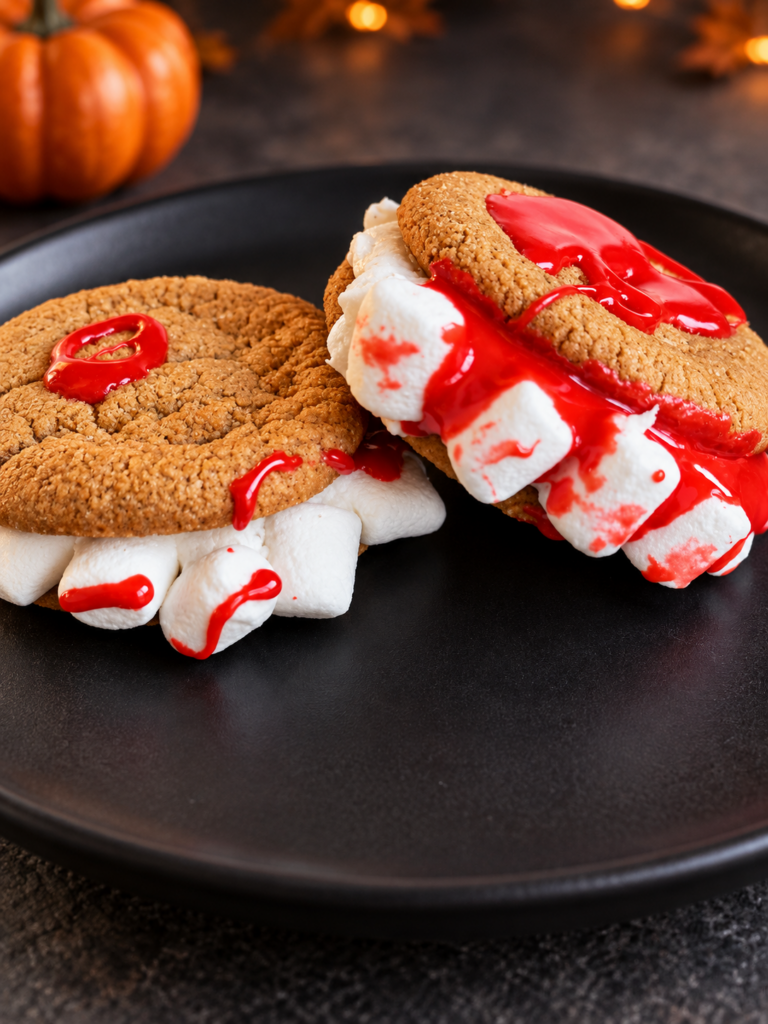
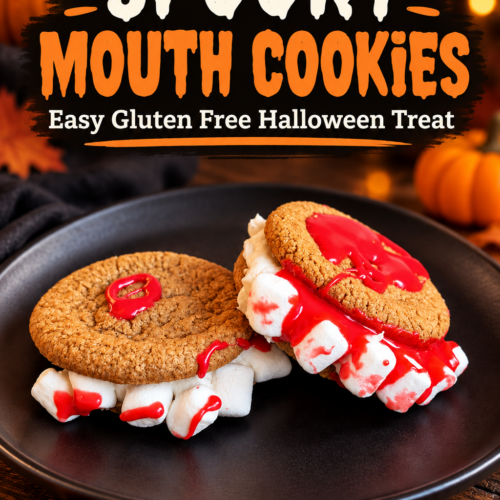
These spooky mouth cookies are a creepy-cute Halloween treat made with soft cookies, fluffy frosting, mini marshmallow teeth, and dripping red icing. They’re easy enough for kids to assemble and perfect for Halloween parties, classroom celebrations, or a family movie night!
Welcome to Shane’s Spooky Kitchen!
From now until Halloween, Shane’s Spooky Kitchen is serving up our favorite gluten free recipes for Halloween parties—including kid-friendly mocktails, sweet treats, and spooky eats!
I can’t take credit for today’s recipe idea, though. These adorable spooky mouth cookies were completely my niece’s creation! She wanted to contribute a recipe to Shane’s Spooky Kitchen, and she and Shane had so much fun making these together.
They were easy, messy in the best possible way, and turned out equal parts creepy, cute, and delicious!
Why You’ll Love These Spooky Mouth Cookies
- Easy enough for kids to make
- Require only a few simple ingredients
- Can be made with any flavor of cookie
- Easy to make gluten free or dairy free
- Perfect for Halloween parties
- No special baking or decorating skills required
- Completely customizable
Ingredients
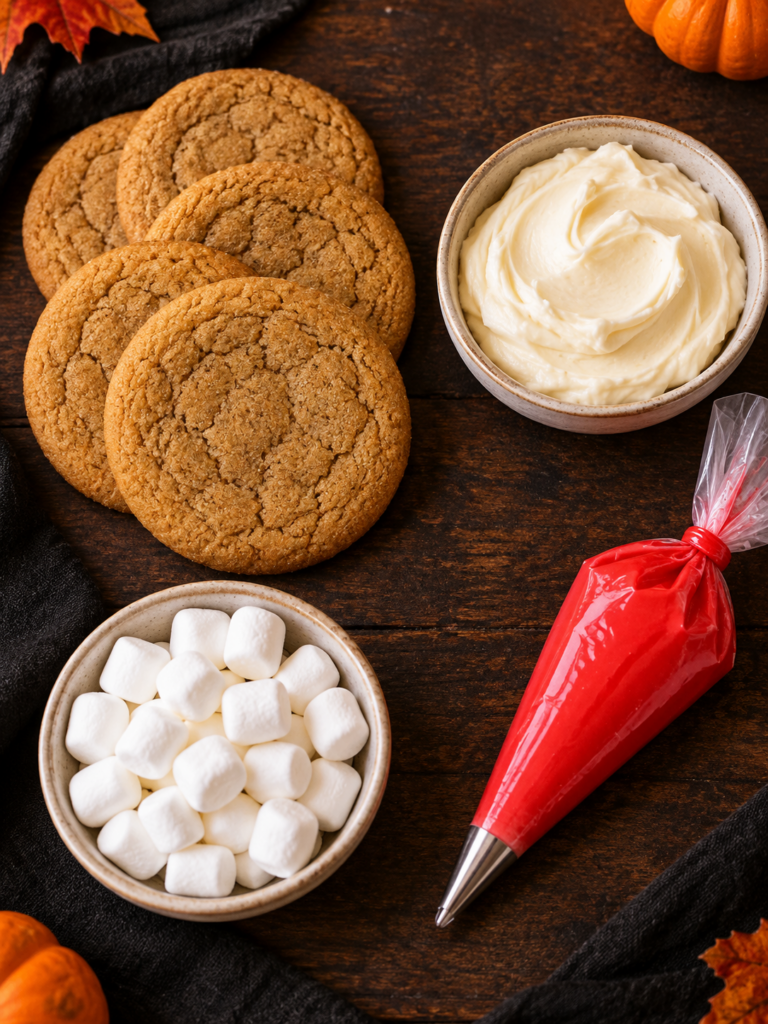
- 2 cookies per spooky mouth
- Homemade cream cheese icing or buttercream frosting
- Mini marshmallows
- Red decorating icing
Our Favorite Cookies
We used Sweet Loren’s Pumpkin Spice Cookies, which are both gluten free and dairy free. Their warm pumpkin spice flavor makes them perfect for Halloween and other fall celebrations.
However, any cookie will work! Chocolate chip, sugar, pumpkin, snickerdoodle, or chocolate cookies would all be delicious.
If you need the finished cookies to be gluten free, always check the labels on every ingredient and choose cookies that are certified or clearly labeled gluten free.
Frosting Options
We filled our spooky cookie mouths with homemade cream cheese icing, but you can use any thick frosting you enjoy.
My homemade gluten free buttercream frosting would also work perfectly. It’s thick, fluffy, and easy to spread between the cookies.
To keep the cookies dairy free, use dairy-free buttercream or cream cheese-style frosting. Although the Sweet Loren’s cookies we used are dairy free, traditional cream cheese icing and buttercream contain dairy unless dairy-free substitutes are used.
How to Make Spooky Mouth Cookies
1. Prepare the cookies
Bake the cookies according to the package directions and allow them to cool completely.
You will need two cookies for each spooky mouth.
2. Add the frosting
Turn the cookies over so the flat sides face upward. Spread or pipe a generous layer of cream cheese icing or buttercream onto the flat side of each cookie.
The frosting helps hold the cookies and marshmallow teeth together, so make sure you spread it close to the edges.
3. Create the mouth
Place the two cookies together at an angle, leaving an opening between them so they resemble an open mouth.
4. Add the marshmallow teeth
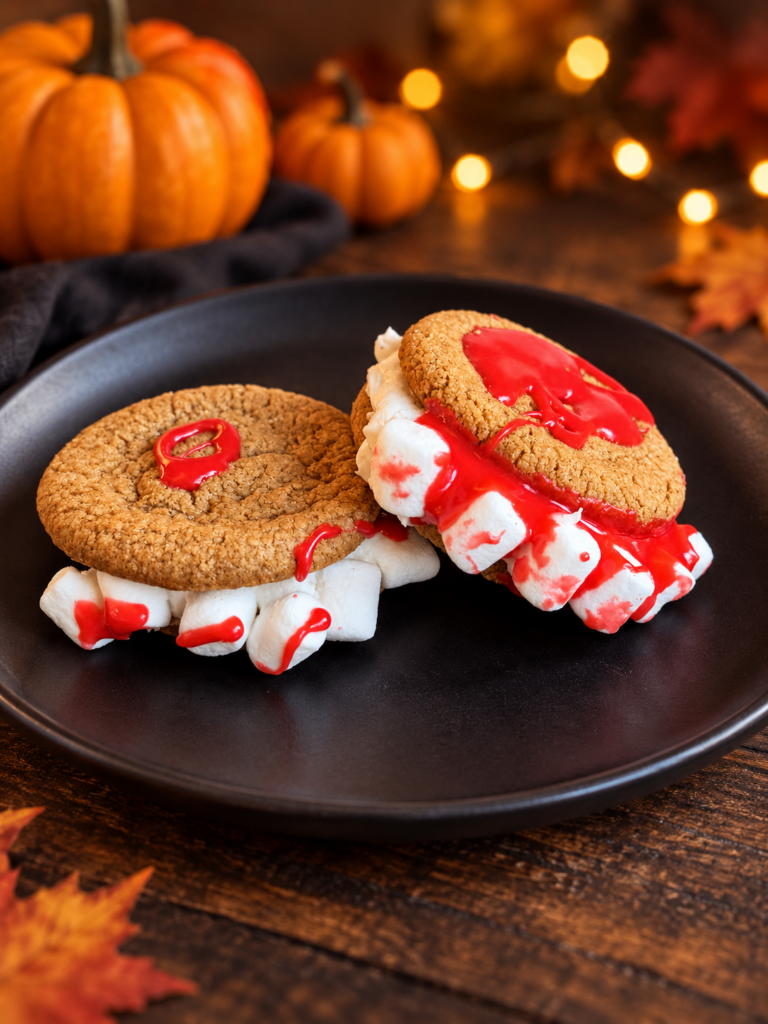
Press mini marshmallows into the frosting along one or both sides of the mouth. We lined them up closely to create a full row of silly, spooky teeth.
Don’t worry about making the teeth perfectly even. Crooked teeth make the cookie mouths look even more fun!
5. Add the “blood”
Use red decorating icing to create drops of blood coming from the marshmallow teeth. Add as much or as little as you’d like.
Serve the cookies immediately or refrigerate them until you’re ready to enjoy them.
Tips for Making These Cookies with Kids
Set out the cookies, frosting, marshmallows, and red icing in separate bowls or stations before getting started. Kids can then decorate their own spooky mouths without needing much help.
These cookies don’t need to look perfect. Let the kids make crooked teeth, long vampire fangs, extra frosting, or lots of dripping red icing. Every cookie mouth can have its own funny personality!
This is definitely a hands-on recipe, so expect a little mess—and have plenty of napkins nearby.
Spooky Mouth Cookie Variations
Vampire Mouth Cookies
Place two longer marshmallow pieces near the front of the mouth to create vampire fangs.
Monster Mouth Cookies
Tint the frosting green, purple, or orange before assembling the cookies.
Chocolate Monster Mouths
Use chocolate cookies with vanilla frosting for a bold black-and-white monster look.
Googly-Eyed Cookie Monsters
Place candy eyes on top of the cookies using small dots of frosting.
Peanut Butter Apple Mouths
For a lighter alternative, replace the cookies and frosting with apple slices and peanut butter. Always check for nut allergies before serving these at a party.
Can I Make Spooky Mouth Cookies Ahead of Time?
These Halloween cookies are best assembled shortly before serving. The frosting and marshmallows can soften the cookies when they sit for an extended period.
You can bake the cookies and prepare the frosting a day or two ahead. Store them separately, and then let the kids assemble the spooky mouths on the day of your party.
If you need to assemble them early, store the finished cookies in a single layer in an airtight container in the refrigerator. Allow them to sit at room temperature for a few minutes before serving.
How to Serve Spooky Mouth Cookies
Serve these cookies on a black platter surrounded by extra mini marshmallows, plastic spiders, or other food-safe Halloween decorations.
They would be a fun addition to:
- Halloween parties
- Classroom celebrations
- Fall festivals
- Halloween movie nights
- Kids’ sleepovers
- Monster-themed birthday parties
- Family Halloween baking nights
Kick Off Spooky Season with a Festive Mocktail
Turn these spooky mouth cookies into the perfect Halloween party pairing by serving them with my Fall Sangria Punch Mocktail. Made with crisp apples, fresh orange, apple juice, sparkling cider, and cinnamon sticks, it’s a bubbly, alcohol-free drink that both kids and adults can enjoy. Together, the cookies and mocktail are a fun and delicious way to kick off spooky season!
Spooky Mouth Cookies: An Easy Gluten Free Halloween Treat
Ingredients
- 2 cookies per serving baked and cooled
- Cream cheese icing or buttercream frosting
- Mini marshmallows
- Red decorating icing
Instructions
- Bake the cookies according to the package directions and allow them to cool completely.
- Turn two cookies over so their flat sides face upward.
- Spread or pipe frosting onto the flat side of both cookies.
- Position the cookies at an angle to create an open mouth.
- Press mini marshmallows into the frosting to form teeth.
- Drizzle or pipe red decorating icing around the marshmallows to resemble dripping blood.
- Serve immediately or refrigerate until ready to serve.
Notes
Notes
- We used Sweet Loren’s Pumpkin Spice Cookies, which are gluten and dairy free.
- Any variety of cookie can be used.
- Use certified gluten free cookies and verify every ingredient label when serving someone with celiac disease or a gluten allergy.
- Use dairy-free frosting if you need the finished cookies to be dairy free.
- For the best texture, assemble the cookie mouths shortly before serving.
The Cutest Addition to Shane’s Spooky Kitchen
These spooky mouth cookies were such a fun addition to Shane’s Spooky Kitchen—and I love that the idea came entirely from my niece! She and Shane had the best time decorating the cookies together, adding marshmallow teeth, and deciding exactly how much “blood” each mouth needed. They turned out so cute and delicious, and they’re proof that Halloween treats don’t have to be complicated to create a special memory with the kids. Stay tuned for more gluten free mocktails, sweet treats, and spooky eats from Shane’s Spooky Kitchen!Join My Gluten-Free Kitchen Crew
Get my favorite gluten-free recipes, tips, and grocery store finds delivered right to your inbox! Just pop your email below, and let’s start cooking up some magic together!